
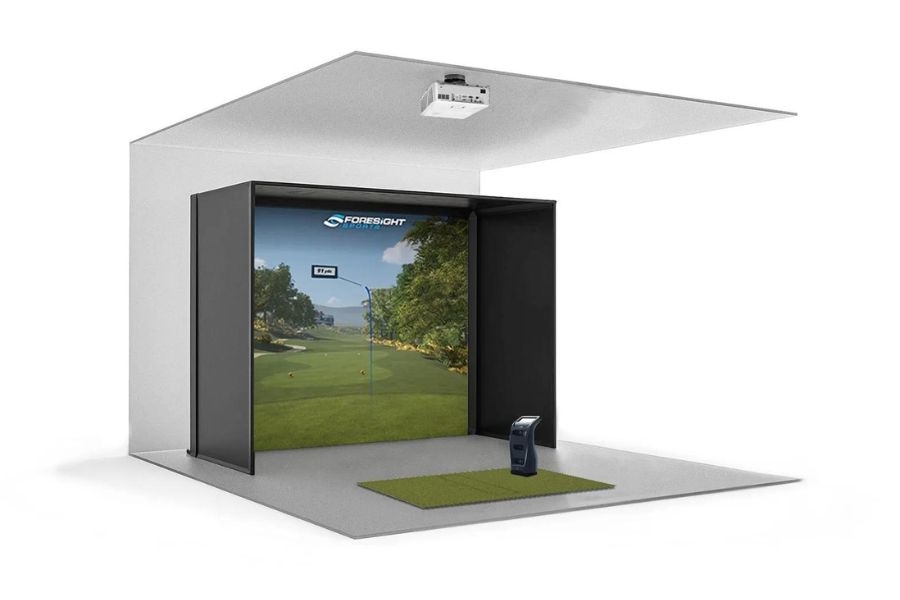
Building your own DIY Golf Simulator Enclosure is one of the best ways to save when designing your golf simulator room. These enclosures will offer detailed instructions on the pipes you will need, and measurements to allow you to get these materials locally at a cheaper price.
With some basic handy skills, and the aid of a friend these DIY golf simulator enclosures are easy to build, and put together. They offer a great way to save money when buying a golf simulator. Let’s have a look at the best DIY golf simulator enclosure to help make your decision on what to buy easier.
Best DIY Golf Simulator Enclosure: Carl’s DIY Golf Enclosure Kit
I recently reviewed 20 of the best home golf simulator rooms and of those designs, 13 out of 20 opted for a Carl’s Place Enclosure, 11 of 20 used their DIY Golf Enclosure Kit. With many of the top golf simulator room designs using Carl’s DIY Golf Simulator Enclosure, it is clearly on top as the best do-it-yourself enclosure. Let’s look at why it holds the top spot.
Price
The Carl’s Place DIY Golf Simulator Enclosure is not only the best quality DIY golf simulator enclosure but it is also one of the cheapest. Carl’s Place motto is to make golf simulators available to all golfers, and they help individuals achieve this by providing a high-quality enclosure at an obtainable price.
At the time of publishing the base model of Carl’s Place DIY Golf Simulator Enclosure starts at under 1000$, When you consider other brands are charging upwards of 3,000 to 5,000 for a full golf enclosure kit it makes the Carl’s Place DIY substantially cheaper.
Whether you are looking for a high-quality golf simulator enclosure, or looking to build a full golf simulator on a budget Carl’s Place should be your very first consideration for a golf simulator enclosure. Their ultra-competitive price point sets a standard in the golf simulator enclosure market. It is one of the primary reasons so many golf simulator owners trust Carl’s Place for their golf simulator enclosure.
Size & Screen Options
Car’s Place DIY Golf Simulator Enclosure is the top choice for a DIY golf simulator enclosure because of the many options it offers. The consumer has many customizable options that fit both their room dimension and budget needs.
Currently, Carl’s Place offers their DIY Golf Simulator Enclosure in six different sizes. The smallest option starts at 7.7 by 10 feet, with the biggest option being 9 x12 feet. The full dimensions of each enclosure can be found here. If you are unsure of how to choose the right size for your golf simulator enclosure Carl’s offers a great article on this topic, that I would recommend to check out. If you still have questions reach out to Carl’s directly as they have an extremely helpful staff to help.
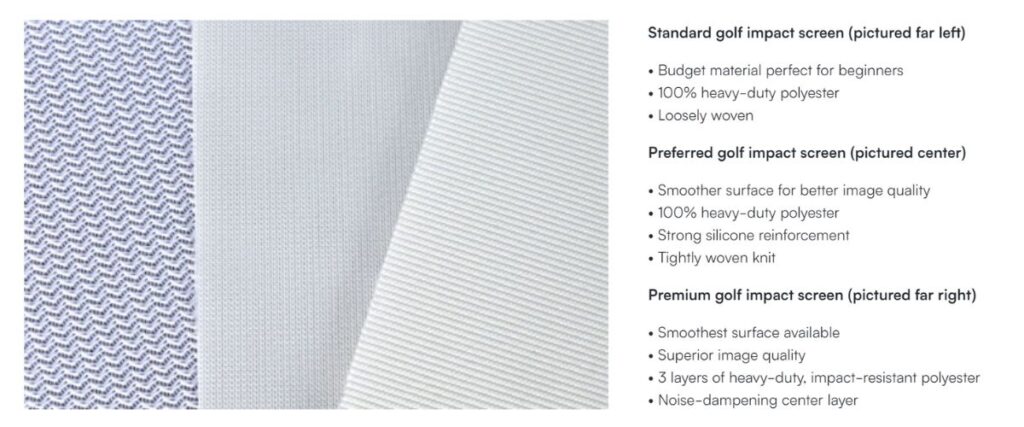
Another option Carl’s Place offers is the quality of the screen. Carl’s offers 3 different materials for the impact screen included with their DIY golf enclosure. The standard option is made of 100% heavy-duty polyester. The fabric is more loosely woven, making it a budget-impact screen option. The premium option offers 3 layers of heavy-duty impact-resistant polyester. It offers the smoothest surface, creating the best image quality. It also has a noise-dampening center layer to reduce ball impact noise.
A lower-quality impact screen deteriorates at a higher rate than a premium model. If you are planning to put your golf simulator through a high rate of use, in my opinion, the extra money invested in a premium model is worth it as it will last longer. Ultimately as a consumer, I am very happy that Carl’s offers three different material qualities that can appeal to each individual’s budget.
Finally, Carl’s also offers many add-on options to add further customizability to your DIY golf simulator enclosure. You can add on everything from a safety net for mishit balls to an additional black cover kit if you have ambient lighting that will be coming in from behind the enclosure.
Carl’s Place has you covered for anything you can think you will need for the enclosure. The flexibility of options, and how it a one-stop shop for all your needs is one of the many factors that make it the best DIY golf simulator enclosure.
Easy Assembly
Carl’s Place has an outstanding reputation in the industry for being very customer-focused. They provide excellent resources to make putting together their DIY golf enclosure a breeze. Look at the extremely detailed step-by-step video they have put together above. Their instructions are clear, and the video offers excellent visual instruction to help you in the assembly process. Their easy installation process allows even non-handy users to build their DIY golf enclosure.
One thing that sets Carl’s Place DIY golf enclosures apart from others on the market is that they allow you to purchase your own piping. Other DIY golf enclosures are not do-it-yourself because they lock you into pre-set materials, so actually all you are doing is assembling their out-box materials as you would any other golf simulator enclosure.
What Carl’s Place does differently is they give you the option of using their pre-cut piping, or they will give you the exact dimensions, and amount of pipes you will need to do it yourself. This will allow you to go to any local hardware store, and have the opportunity to get these materials for even cheaper.
Improvements To Existing Design
Carl’s Place has recently released the C-Series of their DIY Golf Simulator Enclosure Kit. This new design improves on their already industry-leading DIY golf simulator enclosure.
The C-Series saw two improvements to the previous design. They have improved the impact screen design to create a sleek borderless bottom that extends completely to the floor. This new design creates a cleaner, and tighter fit.
The second improvement was to their cable system which now incorporates releasable zip ties and a bottom cable that effectively reduces the bounceback of balls. The new design is more effective in absorbing the impact and having the balls safely return to you.
These zips and cables can be loosened to have balls come more straight down or tightened slightly to have the balls roll back to you a little. The luxury is that you have the flexibility to adjust that bounce back to where you want it personally.
Runner Up: SigPro DIY Golf Simulator Enclosure
My runner-up for best DIY golf simulator enclosure is the SigPro DIY Golf Simulator Enclosure. The DIY SigPro enclosure does not come with the piping, and you will have to get the pipes from a local hardware store.
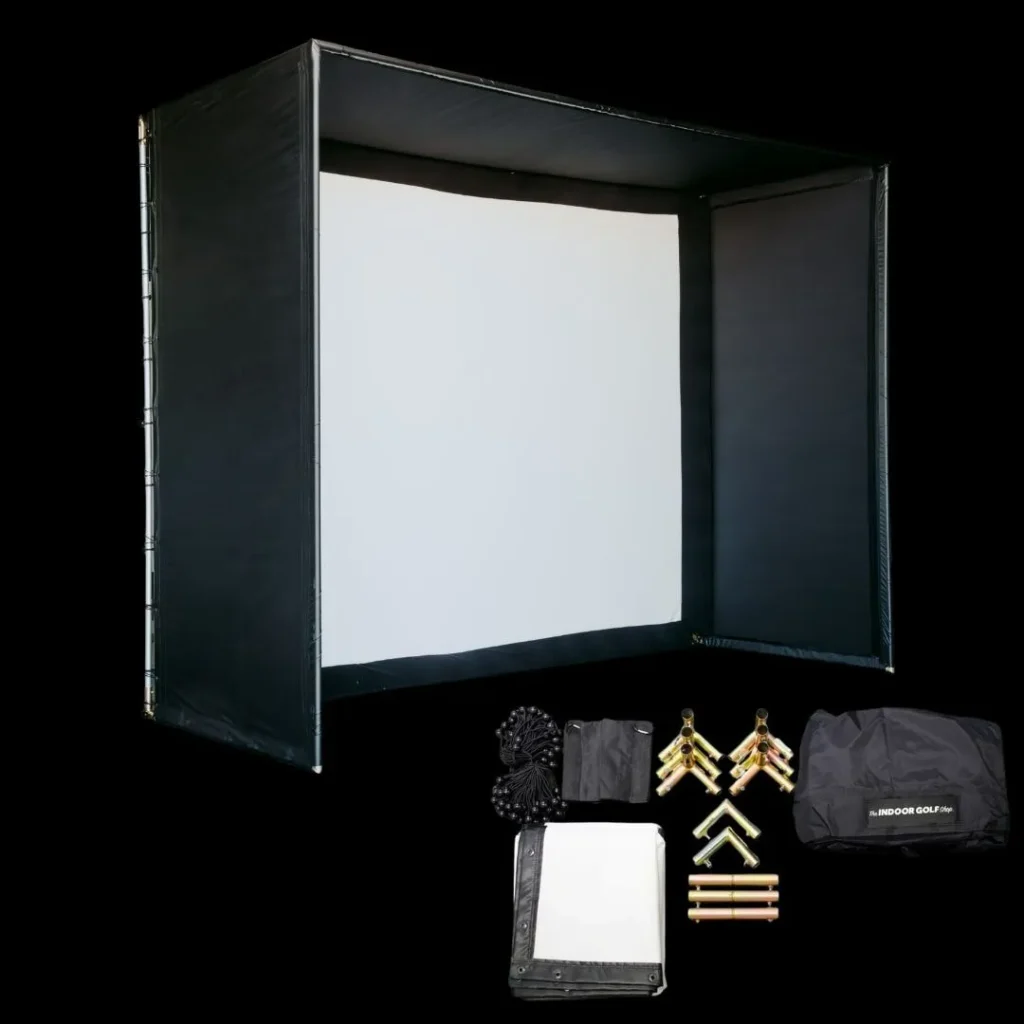
The enclosure kit includes the SigPro Premium Impact Screen, pipe connectors, ball bungees, and a blackout nylon enclosure cover. The SIGPro DIY Golf Enclosure also includes 4 foam paddings to protect the exposed piping against mishit shots. This comes as part of their standard package, where this only available as an add-on with Carl’s Place.
One of the things that hold the SigPro back is the lack of options. It only comes in two sizes, 8.4×8.4 or 10.5×10.5, as opposed to the six-size options offered by Carl’s Place. They also lock you into their premium SigPro Impact Screen. They do not offer the option to get a lower-grade impact screen for potential savings.
The price is similar to that of Carl’s Place when you compare a similar size with a Premium Screen. The SigPro DIY Golf Enclosure is an excellent choice for your golf simulator project. It is slightly outranked by Carl’s Place DIY Golf Enclosure due to the greater range of options they offer. Carl’s Place enclosure gives you a higher range of flexibility that allows you to build exactly the enclosure that meets your specific needs.
Conclusion
Building a golf simulator is always going to be an expensive investment, but it is no longer unattainable for the casual golfer. What always used to be a dream purchase, is now tangible because of more budget-friendly options, that starts with a DIY golf simulator enclosure. It is the number one spot where you can easily shave off thousands of dollars when building a golf simulator.
Today budget golf simulators do not mean having to sacrifice quality. With products like Carl’s Place DIY Golf Simulator Enclosure, you are getting a product that is considered one of the top on the market for a budget price. It allows you the luxury of allocating more of your budget to items that need a higher quality.
You can’t go wrong by starting your do-it-yourself golf simulator build with Carl’s Place DIY golf simulator enclosure. If you are looking at how to complete that package have a read of my article on how to build a high-quality golf simulator for under $5000 (hint: it starts with Carl’s Place DIY Enclosure). If you need more inspiration from other home golf simulator builds have a look at this article breaking down 20 golf simulator room ideas, and what they used to build it. There is no greater time to start your DIY golf simulator project, so get cracking!
Disclosure: When you purchase through my affiliate links on my site, I may earn a commission. As an Amazon Associate I earn from qualifying purchases
Jeff Ross
Hi, I'm Jeff Ross, and my golfing journey began over 25 years ago, marked by a shaky swing and more slices than I'd like to admit. Despite the initial challenges, my profound love for the game took root, and I realized that golf had a hold on me—an enduring grip that pushed me to improve daily. Today, with half my life still ahead, I remain committed to this beautiful game, viewing each mulligan and unexpected success as a chapter in a larger narrative of growth. Eager to share my passion for golf, I'm driven by a desire to assist others on their own journeys. Together, let's explore new skills, embrace evolving technology, and delve into teachings that propel us forward while maintaining an unwavering passion for this beautiful game.